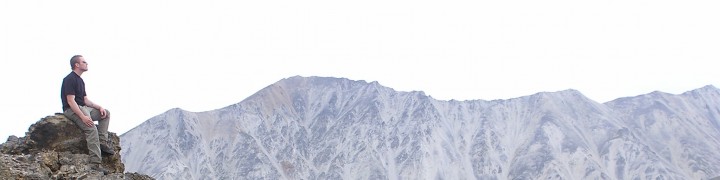
Some of the best ridge climbing in the state. The North Ridge of Mt. Stuart.
The Serpentine Arete route on Dragontail Peak is a great line. The views are magnificient. The route is largely moderate 3rd to 5th class. For that reason you can simulclimb almost all of the route. There is a couple sections of 5.7-5.8 that most climbers pitch out, which usually goes in 2-3 pitches. Then more simulclimbing to the summit.
We had a team of 2 (Stefanie and Jeff) and a team of 3 (Jim, Linsey, and myself). There was plenty of loose rock on the route, so delicate movements are a must. We encountered two rockfalls above us on the route. Thankfully we had good cover or were out of the way.
One thing I figured out along the way was that we weren’t as far up the route as I continually thought we were. Late in the day I could see the summit looming a ways up above us.
Once at the summit, there is an easy scramble path down the backside to the top of a steepish snow slope. Once down, traverse to the north side of Dragontail to the top of Asgard Pass. We plunge-stepped down semi-soft snow to make our way quickly to the east side of Colchuck Lake. An hour of hiking brought us to the other side of the lake to pick up the trail for a couple of hours of hiking back to the trailhead.
For gear, we went with the alpine-style setup mentioned in the last entry. We brought small gear to #3 Camalot (x2), with a couple of doubles in the middle sizes. 15 slings. 12-14 carabiners. We used 2 40-meter ropes. The simulclimbing was done on 1 40-meter. We took out the second 40-meter for the pitched sections only. We had to break up the pitched out sections into smaller pitches because of the length of our climbing ropes. We believe it was well worth the weight savings to do it this way.
Doing this route in a day requires a certain expediency. Expect it to be a pretty long day moving in a team of 3. We moved pretty efficently, but took more time than we would have liked in the pitched out sections. Potential time killers are the initial transition from snow onto the base of the route. The pitched out sections. The delicate and deliberate climbing needed to keep loose rock from tumbling. Don’t expect to speed up the simulclimbing sections if parties are below you in harms way.
All in all, a nice alpine climb with varied obstacles and well worth experiencing.

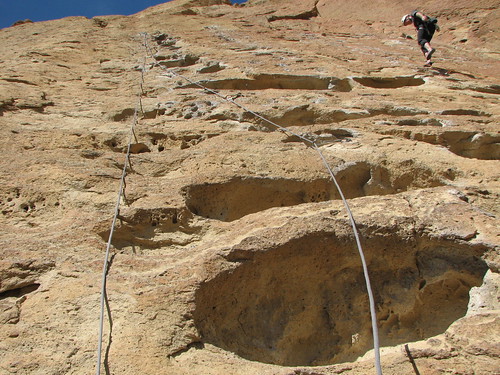
Chris leading pitch on Serpentine Arete
I picked this weight saving tip from Jim Nelson recently on our climb up the Serpentine Arete of Dragontail Peak. Our group wanted to climb the route in a day, which involves about 13-18 hours of effort, from trailhead to summit and back. So we wanted to go as light as possible on the route.
Usually I bring 12 draws on a typical climb, with two carabiners attached. I’ll just clip these ready-made draws to my harness and climb. Pretty typical of what you’ll see at the crag. You place a piece of protection, clip one end of the sling to the pro, and clip the other to your climbing rope right?

crag style

clip biner to pro
To shave weight, we took our 12 naked slings and slung them over our shoulder. Them clip 12 biners directly to the harness or clip one biner on each sling. As we place pro, we attach our sling directly to the pro webbing with a girth hitch. Then clipped the other end to the climbing rope. Attaching the slings directly to the pro webbing with a hitch allowed us to drop 12 biners of weight, and over a full pound of weight from the crag-style approach.

alpine style

The weight savings means you can bring a few extra slings with you. If you need extension, girth hitch multiple slings together to get the desired length. If you want to shorten your length, loop your sling through the pro sling and clip both ends with your biner.

shorten sling with basket hitch

multiple hitches to lengthen
There are a number of reasons why this style worked well with Serpentine Arete. The route was mostly 4th and lower 5th class climbing. So our strategy was to simulclimb most of the route. There were a few short mid-5th class sections that had to be pitched out though. The advantage to the ready-made draw is that it allows you to clip your rope to your pro quickly. There was no hard climbing on Serpentine, so slinging the pro webbing directly was an easy option. I DON’T advocate girth hitching slings directly to nut or hex wires.
This style is adaptable as well. So if you do encounter a hard pitch or two, you can reorganize your slings back to crag style for those sections.
Educate yourself on the strengths and weaknesses of girth hitching vs. biners here before using this style:
https://blackdiamondequipment.com/en/qc-lab-connecting-two-slings-together.html
http://dmmclimbing.com/knowledge/improvisation-larks-foot-or-basket-hitch-vid/

“In Zen terminology, “mindlessness” does not mean insensitivity or ignorance. It means that the mind is stable and does not get stirred up by the situations and circumstances one encounters; it means the mind does not grasp anything, it is clear in all situations, unimpeded and undefiled, not dwelling on anything, even nondefilement.”
– Classics of Buddhism and Zen
I will confess to not fully understanding many of the concepts of Zen. The ‘no mind’ is a somewhat absurd idea to many in the western world. Much of what we believe has it’s foundation in the Aristotlian realm of the scientific method and the analysis of the substantial.
Our prejudice has colored much of how we approach the unknowable and the unnameable. Our ability to talk about it, to analyze it, to see it, feel it, and touch it is part of what makes it real to us. Training the western mind to not grasp, to not analyze, and to not think is counter to everything we have learned.
Yet, if you spend a little time with this idea you come around to understanding it’s primary point. You and I wouldn’t have even started climbing if, on some level, we hadn’t acknowledged one of the principle things it provides us. Climbing allows us to slice away preoccupation, compulsive thought, and overanalysis of all the minute details and stresses of our daily lives.
In my experience, when I climb I have an efficiency of thought. The only things passing through my mind are the things that should. What is occurring right here, in the now? I am behaving instinctively, like an animal. A human animal. When I am climbing GOOD, I am not investing myself in any result. I’m not overanalyzing my pro placements. I’m not overly concerned about falling. The power that thinking has over each minute and second is dwindling and the power of my feeling is receding to the background.
It is as if thought is merely serving it’s purpose and isn’t an entity in itself. It is not there. You are not there. The only thing that seems to exist is THE PROCESS and your job is to simply stay out of it’s way.
The legendary Zen master Takuan Sōhō said:
The mind must always be in the state of ‘flowing,’ for when it stops anywhere that means the flow is interrupted and it is this interruption that is injurious to the well-being of the mind. In the case of the swordsman, it means death. When the swordsman stands against his opponent, he is not to think of the opponent, nor of himself, nor of his enemy’s sword movements. He just stands there with his sword which, forgetful of all technique, is ready only to follow the dictates of the subconscious. The man has effaced himself as the wielder of the sword. When he strikes, it is not the man but the sword in the hand of the man’s subconscious that strikes.
Unless you train your mind then this process will only happen randomly. You will marvel over that day you had at the crags where you were almost skywalking up every route and it all came so damn easy. You will even try to think of what things happened that day that led to this peak climbing experience. You may even try to recreate those circumstances in the hopes that you will strike ‘climbing gold’ again. This is the western way of thinking.
But if you are open minded and your complete devotion is to doing anything that will make you a better climber, then you have to be ruthless. Dispose of anything and everything which is not helping you evolve. Mete out old ways of coping that may have helped you when you were a child, but have no place in today. For many of us, it’s ego-reduction.
I used to defend all of the excessive time I spent mulling over pro placements because of my ‘attention to detail’. But it was an argument based on fear. Truthfully my pro placements only got worse the more time I fiddled and adjusted them. I was holding onto the limited.
There are a million ways to defend our way of grasping to mind. We HAVE to think about quality pro placements. We HAVE to judge our risk factor. We HAVE to be thinking creatures to ensure we climb safely and responsible.
You’ll be surprised how many of those things are accomplished without even thinking. With no mind.

Admit it. Driving into Smith Rock you’ve always wonder how the hell these rock formations got out there in the middle of all those rolling hills. An interesting writeup from Sarah Garlick’s book Flakes, Jugs, and Splitters: A Rock Climber’s Guide to Geology addresses the mystery:
“The spectatular spires and walls of Oregon’s Smith Rock State Park are carved out of 30-million-year-old welded tuff and rhyolite rocks that formed from the ash explosions and lava flows of an eruptive volcano. Geologists have identified a 230-square mile depression, called a caldera, that is all that is left of this ancient volcano. A caldera is a giant crater that forms when a magma chamber beneath a volcano erupts a large volume of material. The top of the volcano literally collapses into the newly emptied chamber, creating a huge depression. Smith Rock State Park is on the northwest corner of what is now known as the Crooked River Caldera.”
The distinct pockets of Five Gallon Buckets were formed by air bubbles caught in the compressed volcanic ash that makes up the rock wall you see here
Interesting to think that Smith Rock is a mere corner of a huge crater. One question bends to mind would be what about the rest of the outer edges of this crater? Wouldn’t there be a circular path of jagged Smith-like remnants winding a 230-square mile path for hungry climbers to explore? Hmm.
One wonders how this all looks from outer space. I wonder if Google Maps can shed a nice visual on this caldera/depression.
But it gets more interesting, on the subject of the distinct rock tower Monkey Face:
“Most of the crags at Smith Rock are made up of welded tuff, a rock that forms when hot ash, sprayed into the atmosphere from a volcanic eruption, settles onto the Earth’s surface in a thick sheet, hardening as it cools. Like lava, when ash cools it contracts, sometimes forming giant columns separated by vertical cracks. The Monkey Face at Smith Rock is one of these columns of hardened ash, now weathered and eroded into it’s spectatular shape.”
It’s no wonder the features in the rock look the way they do. All of the nubbins and chickenheads literally welded into the tuff itself. When I first climbed at Smith I remember wondering whether these little rocks sticking out of the rock face would not break off under the stress of my weight. Remarkably I have never had one break on me yet.
It’s an amazing testament that the geological processes make it so that we can essentially rock climb on hardened ash(!) that’s every bit as reliable as granite.
On that note, here’s a time lapse of Dwayne and myself climbing the last couple pitches of the ‘icon of ash’ itself. Cheers.
We’re almost into June and well enough time to reassess some of my goals for the upcoming summer. I set my optimal weight for summer climbing to be at 185 lbs. Currently I tip the scales at 207 lbs, which i’m not too happy about. Just five short weeks ago my wife gave birth to my beautiful daughter Ryan. We are certainly ecstatic about this incredible gift, but it hasn’t lent itself well to keeping to my climbing targets. The erratic sleep patterns and suspect eating habits have contributed largely to the status quo.

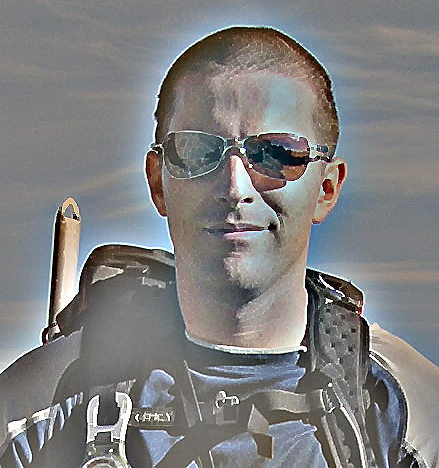
my shiny, new climbing partner
The good news is that despite my current weight, my gym climbing hasn’t suffered noticeably. In fact, it has improved over the past few months. In keeping with my bouldering pyramids and projecting difficult routes, my confidence in dealing with hard sections of climbing has only been increasing.
Biking to work every day was the lynchpin to my cardio effort. Realistically, with all sorts of baby obligations, it will be an effort to get 3 days of biking a week. But I know that my performance on routes like Liberty Crack or Backbone Ridge on Dragontail Peak will suffer considerably if I don’t get my weight sub-200 lbs.
So the strategizing continues…
On another note, I have had a little more time on my hands to work on some other things. I’ve recently annotated a topo of The Smoke Bluffs Connection. Smoke Bluffs is a collection of crags located near the town of Squamish, B.C. It’s known for outstanding one and two- pitch trad routes in a variety of skill levels.

Squamish cracks are mint. Route is Jabberwocky (5.10a)
The Smoke Bluffs Connection, SBC for short, are 4 outstanding routes in close proximity to each other. It’s possible to connect all 4 routes together to make for a great few hours of trad climbing. You can lead all the routes from the bottom, or start from the top of Jabberwocky and work your way down. The latter is recommended for beginners as it gives you the option of toproping all the routes.
Click on the image to get the high res shot:

Smoke Bluff Connection
Some words on the routes. Mosquito Crack (5.8) is probably the most popular crack in Smoke Bluffs and the preferred way to start the SBC. So it’s always got traffic. Sphinx’ter Quits (5.8) is an excellent alternate start though. It’s got a mixture of balancy and reachy moves coupled with solid handholds. It gives you that harder feel without being harder, if that makes any sense. Both Mosquito and Sphinx’ter top out below Phlegmish Dance (5.8), a great corner crack. Once you top out, take a short trail climbers left to the base of Jabberwocky. Jabberwocky (5.10a) is one of the most enjoyable face cracks i’ve climbed in Squamish. The bouldery crux down below takes a little time to figure out. From there you are rewarded with a crack that was made for finger/hand jams. Protects well, and is just enjoyable. At the top of Jabberwocky you have the Pixie Corner crag to climbers right, with alot of nice, moderate cracks to choose from. OR you do Wonderland (5.9). You can’t really see much of the route because of it’s exposed nature. So you just have to decide to do it and encounter as you go. It starts out on a diagonally crack for hands, smearing feet off of the face. Then you hit the crux 5.9 crack. Place your pro before the crack as there is a bad pendulum if you fall. After the crux you cram yourself on a ledge and worm your way forward. It’s quite awkward but works fine. Then some last moves to the top. It’s nice and sustained, but great fun.
So that’s the SBC. Do it!
I had a few moments to annotate a future project i’ll be working on. You may recognize it. Got a little Captain in ya?

The Nose of El Capitan
http://vimeo.com/groups/15783/videos/8544757
Watch the video and there’s something quite different about the way Fred Nicole climbs. If climbers represented creatures I think he would be a cross between a sloth and a monkey.
There’s a certain aesthetic we’ve been bred to emulate. The dynamic, power-first approach that you see in every climbing gym, every crag. There is a need to forcefully push through a route if you can. This emphasis never more obvious than in the world of bouldering. Yet, Nicole has been climbing the hardest bouldering routes with deliberate, supremely controlled movements.
His is such a contrast to my personal style, which has always emphasized quickness. The faster you move, the quicker you finish your route. But does speed equal ultimate efficiency? Does it measure to the best way to climb a route?
There is a measure of satisfaction in knowing that you can complete a route with maximized control over each move. A pace where you feel each move transitioning into the next. In the end, the climb felt more like a graceful symphony than a sprint to the finish.
In the past, whenever I toproped a route I always preferred to have my belay tight. Probably more inspired by fear, I thought that if I fell I didn’t want to travel very far. I have begun to rethink this philosophy. More than ever I have requested that my belayer keep the rope a little loose. It is an important thing to know that it is you who is doing the climbing. The slack in the rope confirms that I am not receiving any artificial assistance from a tight belay.
In the process I have come around to seeing how important the control aspect means to my climbing. Yes I still practice moves on routes. I hangdog when I need to. I french free what I need to. But when I am fully ready to completely free a route, that is exactly what I do. Fred Nicole style.
It’s just another way of letting go of the irrational fear in our hearts. Climbing somewhere between a sloth and a monkey. Deliberate, in control. Like a slow motion sequence.
There is a time and place for speed, but our need to be fast is less than we think. Too often our speed is motivated by anxiety and fear.
Does climbing need to be fast? Should it be? One wonders. I think Fred Nicole has a firm answer. A firm, trusted philosophy. One I can respect.

Photo by Chuck Fryberger

Back in December I touched upon the Bouldering Pyramid as a method of building climbing stamina. Since then, i’ve noticed an overall increase in productivity in the gym. Less standing around, less socializing. More face time.
So just to recap there are three components to my typical pyramid day:
1. 5-10 minutes warmup (traversing, ARC’ing)
2. 30-45 minutes bouldering pyramid (currently V1-V4)
3. 15-20 minutes projecting new routes
I do pyramids 2-3 times a week during the weekday. The weekend is devoted to outside climbing or projecting new routes in the gym. After a couple of months to adjust to this workload i’ve added the 4×4.
The 4×4 has been around for quite some time. It’s a standard training technique used to increase anaerobic capacity. With all anaerobic activity the intensity is increased dramatically when compared to my present workout. There are a number of benefits to 4×4:
1. Increases in anaerobic capacity.
2. Improves climbing form and focus when in an exhausted state.
3. Can be customized to train specifically to your current outdoor projects.
The 4×4 is simple.
You will climb four bouldering routes consecutively, with no rest. Ideally you want to pick routes that are in close proximity to each other in the gym. Preferably you can climb a route and downclimb to the start of your next route. You only want to spend time on the ground to get to the next route.
Climb at your own pace. There is a tendency to rush through your routes, fight it. Find a steady climbing pace, paying attention to form and technique.
You will be timing yourself, from beginning of the first route to the end of the fourth route. Once you finish all four routes, check your time. That is the amount of time you will rest before you begin your next set.
It’s an advantage to have a friend time your sets for you and providing a spot. The general rule about not completing a route is that if you fall off the route during the first half of a route, start over again. If you fall on the last half of it, move on to the next route.
If you find yourself having trouble completing all of your routes then you may need to select easier routes.
There are a number of ways of picking your routes. They have to be routes that you have done a few times. Ideally you want to just barely finish the last route on your fourth set. To get the most out of the 4×4 I pick my routes depending on what outdoor routes I am projecting.
Example: I’m trying to send Route A at Exit 38. Route A starts off on easy jugs, then a short crack crux, continues on a moderate arete, and ends on a crux corner stem.
So I find bouldering routes with these characteristics. My 4×4 set looks like so:
V1 (jug route) – V2 (crack route) – V1 (arete route) – V2 (corner stem)
Of course you’re limited by the variety you find in the gym. You may not be able to find the combination you want. Do the best you can to find similar routes.
One set = V1 – V2 – V1 – V2
1st set (2:30)
rest for 2:30
2nd set (2:20)
rest for 2:20
3rd set (2:45)
rest for 2:45
4th set
Done!
This routine maxes you out so i’d suggest saving this for the end of your gym climbing. It takes some fine tuning to determine how hard you can go and what routes you should include, but it’s worth it.
This is not a routine that you will want to do every day. It’s recommended that you have 48-72 hours in between each routine to get proper rest.
What I like best about the 4×4 is that it trains you to work through fatigue. Imagine you are leading a route, feeling the nasty pump, the sweat is flowing, and you are having trouble focusing on finishing your lead. That’s how the last set of a 4×4 looks like. With practice you develop the confidence to work through those difficult moments, by keeping your head about you, staying focused on your technique despite the fact that you are in desperation mode.
It’s a welcome addition to my climbing regime. Some have credited routines like the 4×4 with rapid gains in climbing levels in the past 40 years. But this training tool is something that climbers of all skill levels can add to their current workout. I’d recommend you give it a trial run and, like everything else, if you see results keep it in the training arsenal for good.

Fear Is The Mindkiller
The mental aspect is a huge part of rock climbing. I would only be mildy exaggerating if I were to say that it’s everything because a big aspect of climbing involves managing fear. There is the danger in every climb of succumbing to your fear of what may happen. Elite climbers are so much better than others at many things. They have an excellent body mass index. They possess impeccable technique and footwork. Their aerobic and anaerobic reservoirs are deeper. More than anything though, an elite climber is a master of the mental game.
If you could imagine a gauge in your head. On one side is your fear of the worst. On the other end is what is actually occurring as you climb. The best are consistently able to keep their minds focused on what they have in front of them at this moment.
It’s ironic in our climbing world that there is so little literature available covering the most important aspect of what we do. The bookstore shelves are stacked with all manner of how-to books on the physical aspect of climbing. From hand and foot techniques to climbing styles to training manuals, it’s all there. Well except for what we need most.
I can’t necessarily fault anyone because the mental side is difficult to really describe on the page. There is alot of resistance from the climbing community as mental training is often considered hokey. As well, we all can be a little protective about what works for us individually. It sometimes get’s dangerously close to the superstitions of wearing your ‘favorite shirt’ you wore when you sent that hard 5.11a or insisting on bringing along your lucky #3 Camalot that’s always come through in the clutch.
So being introspective about the mental approach isn’t for everybody. It’s the reason why there are only a handful of climbing books on the market right now.
I’ve got my own mental approach, and I believe it’s highly important that you have one. Most of what I do involves managing fear and keeping my ego in check.
My basic approach goes something like this. For each route I approach I analyze the objective hazards. I’m usually looking for the crux sections, and portions where a fall would lead to potentially dire consequences. I work out the sequences of climbing, the possible rest spots, the sections I have to move quickly through, etc.
Right before I begin the climb I check in with myself mentally. This usually involves taking some conscious breaths because what I always do when I get anxious is forget to breath. Breathing decreases tension in the body and reduces anxiety.
An interesting excerpt from the Dan Osman bio Fall Of The Phantom Lord elaborates nicely about the role of breath:
(Right before the climb…) “I start breathing,” (Osman) explains, “to get the ki down into my hara.”
Loosely translated from the Japanese as “vital energy,” ki is to the martial artist as harmony is to the musician. The hara (literally, “belly”), a point in the abdomen below the navel, is held to be the center and source of physical energy–a reservoir of sorts in which ki, largely through breath control, may be pooled and from which it may be directed.
“I visualize a screen,” Osman continues, “a steel filter that I lower with my breaths to keep the positive energy and let the negative energy escape. All the fear I allow to escape.” When he is centered–a process that takes from five to twenty minutes–he is ready to climb. “I feel the air pressure,” he says. “The ki is very concentrated, very strong. I feel the gravity more. When I step onto the rock, my senses immediately sharpen. The taste in my mouth becomes vivid.”
My breathing is not quite as long or as elaborate as Osman, but I take away alot of the same things. The breathing and focus on the breath just for a few moments resets me to the task at hand and immediately relaxes and energizes my body and mind for that initial moment I begin. The acute sense of sharpness that consciously awakes you is another product of the breath.
A mental technique that often happens subconsciously is to chunk a route. This involves breaking down a route into a series of small chunks of climbing. Each chunk has it’s own challenges, it’s own characteristics. You don’t want to look at a route in it’s entirety and get completely overwhelmed. So climb through each chunk until you can put it all together and send the complete route. It’s also an effective way of staying in the moment, focusing on the 5.7 slab that is in front of you, not the 5.10a face crack that you are dreading 50 feet up. All solutions are realized by staying aware in the moment. This has been helpful to me, especially on long, multipitch routes where there is a laziness of the mind and a tendency to think ahead of yourself.
The Bible for mental climbing is still waiting to be written. I have read the handful of books out there and gotten a number of useful ideas, but nothing has captured the entirety of the process in a compelling and engaging manner.
I think the best book on the market is the Rock Warriors Way by Arno Ilgner. It does provide a process for climbing. Characterized by the steps you see below, it is indeed a way:

Aspects of The Way
While my approach doesn’t entirely subscribe to the way Arno does it, some of these aspects really resounded with me. It actually got me thinking about my ego and the role it plays in my climbing. How I have learned to rely on it in ways that have really bitten me in the past. I spend alot of time about thinking of completing a route and what kind of feeling that gave me. It’s a good feeling! We should enjoy our milestones. But when you climb that 5.9 trad route, you can’t take for granted that you will send every 5.9 route. Or that you are expected to.
Arno really hammers home that we aren’t entitled to anything other than giving our best effort. That’s what stuck with me. Approaching each climb with the question what can I give to this route, to this day of climbing?
I’m not sure about you, but in the past that wasn’t the mentality that I took. I had this idea that I was definitely a 5.9 trad climber and therefore I expected to reach the top of any 5.9 route. If I didn’t i’d beat myself up about it or make some excuse about that being a stiff rating. It was all ego-based and counterproductive to the day. The truth is i’m not expected to do anything on climb day. I may get up it, I may not. The focus is on what kind of effort I can give.
One more aspect that changed my approach was the idea of Accepting Responsibility. This involves collecting the objective information about a climb and seeing the subjective phantom fears for what may happen for what it really is. Ground your climb in reality and once you do, accept the process and your role in it. Accept whatever happens, good or bad. When you encounter an unexpected situation, accepting the process from the very beginning leaves you in a mindset that can make any situation workable and solveable. You are less likely to get outside of yourself.
It is a responsibility when we decide to climb a route and commit to it. Committing to the unexpected nature of climbing means that our minds aren’t ever at the mercy of forces around us. We can always be constructive and creative no matter what the situation.
The Rock Warriors Way espouses a humble, process-oriented approach. It’s definitely worth a read for those not afraid of doing some internal work to become better climbers. It does seem Arno had a little trouble explaining some aspects and sometimes there was a lack of good examples, but overall the book delivers.
I think when THE BOOK on mental climbing is written, it’s going to take many concepts from Arno’s work.

Just another rainy forecast. With that in mind, I thought it would be a good time to do some aid climbing near the town of Index, Washington. The Index Town Wall, as it is known, is the place for challenging trad climbing and stiff ratings. It’s ideal for aid climbing because of the numerous vertical face and corner cracks. It’s very close in character to the type of climbing you would find in Yosemite Valley. Which is why it’s the place we go to train for those Yosemite big wall trips.
I had a pretty good mind we would be climbing a route called City Park. It’s three pitches of excellent clean aid (5.13c

First Pitch - bring plenty of nuts
free, C1 aid) which presented enough issues to make it challenging. It consists of 3 pitches. The first pitch characterized by some free moves to a bolt ladder and leading to an excellent face crack. The second pitch starts with another face crack, concluding with face features with a couple of mandatory free sections. With the third pitch you have some choices. You can do pitch three, or lead a more interesting corner crack variation called Sloe Children. SC is a ballbuster. You’re working with mostly corner cracks which suck you right in. If you’ve been aid climbing even a bit i’m sure you know how we feel about trying to go up aiders while being sucked into a crack. It usually ends up in scraped knuckles and multiple contusions to the knees and shins. Fun stuff!
It’s winter, so the route was wet. The forecast sucked. 50% chance of rain. But since it’s aid that makes everything alright. This climb almost died a short and immediate death. You see we got our gear ready in the parking lot, but I put the damn keys in the car and closed the door. No coat hangers handy of course, but my all-world wooden stick technique saved the day. Door unlocked. Keys retrieved.
I always have a tendency to subconsciously compare the speed of my aid climbing with my free climbing. No matter how fast I move on aid, it’s always way too slow. I wasn’t happy about starting the first pitch with a free climb sequence on wet rock in hiking boots. I just never get stoked over it. Call me crazy.
It felt like I took forever leading that first pitch. I made quick work of the bolt ladder and got into the nice face crack. It sucked up all my wire nuts. I brought 2 complete sets and it still wasn’t enough. I began cannabalizing placements below me and briefly considered placing a camhook. I tried to force in a cam placement. I then yanked on it and it blew, gouging straight into my forehead. That’s what I get for looking at a placement while conducting a yank test. Don’t do that.
Did I mention how camhooks scare the shit out of me? I haven’t had to place one yet, and I know I will need to in the future. There’s just something about seeing how easily it slides downward at the slightest weight shift that just doesn’t sit well. Having said that, if you want to get some practice placing camhooks on a real climb, I would suggest City Park as a good place to do it. But I didn’t have to, and i’m not crying about it.
So I reached the top of the first pitch.
“Shannon! Line is fixed! Oh, and grab that extra set of nuts!”
Shannon began jumaring up the rope. Following on aid kind of sucks. Unless you really enjoy extracting gear out of cracks. Most of the time, you look down and your follower has the trademark wtf face as if you are completely to blame for those unbudgeable nuts. Which you are.
Shannon tops out and we have a brief conversation comparing the grigri vs figure 8 as a backup when following. Grigri is easier and faster btw.
I put him on belay and realized that I had about an hour to kill as he methodically aided up the second pitch. What do you do with all that time? You take pictures. Lots of pictures of stupid stuff you’ll be deleting later. You tend the ropes. You eat a Milky Way bar. You flatten your rope on the ground and sit on it. More dumb pictures. Look closely and you can see my gouged forehead. I could open a gallery exhibit entitled Bored On Belay. It’d be so lame I would probably make alot of money off of it.
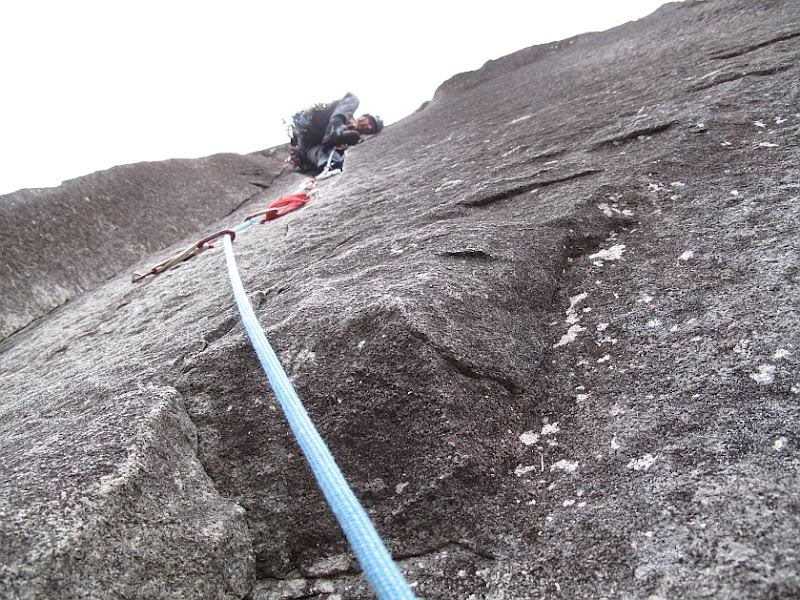
Shannon leading pitch two
Shannon stalled halfway up the 2nd pitch. Apparently he was working the nerve to make a mandatory free move. There are a couple of free moves to make on that pitch, including one right below the anchors. He gets through and fixes the rope at the anchor in good speed.
I follow up the rope pretty quickly, leaving one wire nut which absolutely refused to budge.
Now I lead the third pitch. We choose the Sloe Children variation and there are problems right away. The start is a tiny, shallow, flaring corner crack. I couldn’t even get a micronut in it. The crack begins to look better further up, just out of reach. So I clipped the anchor bolt with my aider and jostled to the top step. Still out of reach.
I put in a very bad placement down below, a small cam. I had no intention of aiding up it. But I was able to use it to steady myself. From there I was able to reach higher up to where the crack opens up and put in a marginal yellow alien. It held as I aided up. Then I got a solid cam above it. Freedom!
Much of the carnage and blood from City Park results from the Sloe Children variation. Scrape, bump, bruise. It’s

Chris leading Sloe Children variation
mostly corner cracks, which suck you right in. So there was alot of flailing and struggling to get my feet into each step of the aiders. Sloe takes a while to get up as well. It’s the reason you bring a headlamp with you in winter. It was nightfall when I put my last placement, below the chains.
You have to make a free move to reach the anchor. I was cranky, tired, and not on board for free climbing on wet rock. So I got all MacGyver on that ass. I managed to get into the top step of my aider. The anchor was still 6-8 inches out of reach.
So I intertwined two wire nuts and mounted my fifi hook on one end. The fifi just barely hooked into the bottom link of the anchor chains. Eureka! Free climbing cowardice always gets my creative juices flowing. I then girthed a piece of webbing onto the fifi sling and yanked myself up.

intertwined wire nuts with fifi mount. cool eh?
The daylight was gone. I called “line fixed” down to Shannon. The valley was dark and foggy. As I stood there waiting in the dark, this high-pitched roar carried through the valley. Three bright lights appeared in the distance, illuminating the leafless, gnarled trees on both sides of the railroad tracks. Four steam engines came barrelling past, towing multiple cars, like some long chinese dragon. More hornblasts boomed as the train snaked down the valley.
All of a sudden, I didn’t mind hanging out high up here on the rock. If this climb didn’t go so late I never would have had the opportunity to see that. We rapped to the bottom, both realizing we only got a small sprinkle of rain the entire day out here. That’s the beauty of aid. You never have to listen to Steve Poole and his fancy-schmancy doppler radar.
__________________________________________________________________
City Park beta: 3 pitches, C1/2, 5.13c. First pitch almost all nuts. Second pitch has 2 mandatory free moves (no prob when dry), mixture of small nuts/cams. Third pitch mostly small nuts, couple of small cams. Mandatory free move up top.
Gear: 2 60m ropes, 2-3 sets of small/medium nuts, small cams, a few medium cams (no bigger than #3 Camalot).
City Park topo: http://www.stanford.edu/~clint/index/ltwcl.gif
Sloe Children variation: http://www.stanford.edu/~clint/index/ltwcu.gif
Index Climbing: http://www.summitpost.org/mountain/rock/236229/index.html
